2018年12月4日 星期二

ESXI 升級至 6.5 遇到的異常


最近將舊的 HP Proliant  G8 G8 從 ESXI 5.5 升級到 6.5,遇到 兩個 異常

1.VIB 錯誤

2.Intel CPU 漏洞警告


1.VIB 錯誤

執行升級作業到 檢查時,會出現 這個錯誤

Image(6)

The upgrade contains the following set of conflicting VIBs:

Mellanox_bootbank_net-mlx4-en_2.0.0.0-1OEM.550.0.0.472560

Remove the conflicting VIBs or use Image Builder to create a custom upgrade ISO image that contains the newer versions of the conflicting VIBs, and try to upgrade again.


參考網路連結處理

https://nolabnoparty.com/en/esxi-upgrade-from-5-5-to-6-5-conflicting-vibs-with-hpe-image/

https://casesup.com/knowledgebase/how-to-fix-conflict-vibs-error-esxi-host-upgrade-from-5-5-to-6-5/


處理步驟:

Step 1: Login  ESXi Host  Over  SSH

Step 2:Remove  Conflict  VIBS

列出 Mellanox 所有的 VIB

esxcli software vib list | grep Mell

查看目前網卡

esxcli network nic list

移除有異常的 VIB

esxcli software vib remove -n net-mst

Step 3:Restart  ESXi  Host and  Start  Upgrade  Steps


2.Intel CPU 漏洞警告

升級完,重開機後,出現警告 esx.problem.hyperthreading.unmitigated

查詢發現是 Intel CPU漏洞 警告

參考VMWare KB,關閉這個 警告

https://kb.vmware.com/articleview?docid=57374&lang=zh_CN

把 UserVars.SuppressHyperthreadWarning 的值,改成 1

Image(5)

2018年9月4日 星期二

NBU Policy Backup Restore


如果需要 更換 NBU Backup Server 時,重建 Policy 是一見很麻煩的事情

其實NBU 的 Policy 是放在  <install path>\netbackup\db\class

只要將這個目錄下的檔案,拷貝放到新的 Backup server 上就完成了


Policy 裡面有四個檔案,最重要的是 clients 這個檔案

Image

把 clients 這個檔案 打開看後,可以發現這個檔案架構是有規律的

其實可以自行修改 client 的名稱,來快速修改 policy

Image(1)

2018年5月22日 星期二

Zabbix 2.4.3 to Line Alarm


1.Line 建立 新群組,這邊建一個  Core-ServerTeam 測試群組

2.到 Line Notify 取得權杖
https://notify-bot.line.me/zh_TW/
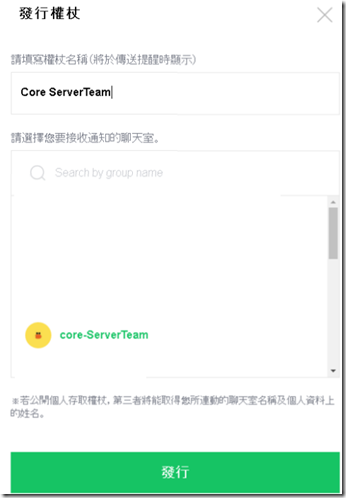
到 個人服務 ,發行權杖
Image
Image(8)
Image(2)
在 Line 上會出現Line Notify, 將 Line Notify 加入 群組

3.公司裡面,如果沒有直接對外,測試 走 proxy,看看 Line 是有收到 訊息
curl -x proxy:80 -v -X POST -H "Authorization: Bearer xxxxxxxxxxxxxx" -F "message=test: test" https://notify-api.line.me/api/notify

4.新增 Script
在zabbix 2.x版本中,當有Alarm通知時,默認會傳3個參數給 Script,它分別為是$1(發送給誰)、$2(發送標題)、$3(發送內容)
在zabbix 3.x版本中,建立 media type時,可以設定  (Administration >> Media types >> Create media type)

vi /usr/local/zabbix/script/line_notify.sh  

#!/bin/sh
export PATH="/usr/local/bin:/bin:/usr/bin:/usr/local/sbin:/usr/sbin:/sbin"
export LANG=C
access_token="xxxxxxxxxxxxxxxxxxxxxxxxxx"
subject=$1
body=$2
# LINE Notify
curl -x Proxy:80 -X POST -H "Authorization: Bearer ${access_token}" -F "message=${subject}: ${body}" https://notify-api.line.me/api/notify
exit 0

5.修改權限
chmod 755 line_notify.sh
chown zabbix:zabbix line_notify.sh

6.測試  Line Notify 是否有收到訊息
./line_notify.sh  test test

7.Zabbix 設定

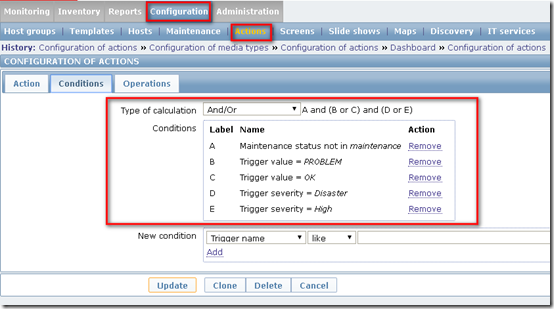
Configuration >> Actions >> Alarm_Line to Zabbix administrators
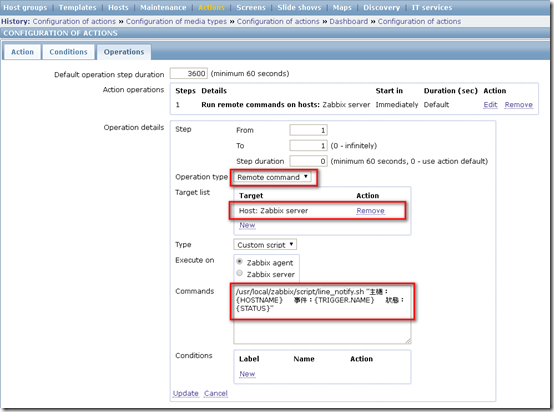
Operations >> Operations >> New
Image(4)
Image(5)
Image(6)

測試 Line 群組,是否可以收到 訊息
Image(7)

參考:

Zabbix の通知を「LINE」に送る

https://qiita.com/kazafe/items/daa21c218cb83a1b4201


2018年5月7日 星期一

Windows ESXI 5.5 升級到 VCSA 6.5


目前 還有很多 ESXI 5.5 版本,先確認 Vcenter 版本支援

確定 VC 6.7 不支援 ESXI 5.5 ---- 只支援到 VC 6.5 ,所以只能升級到 VC 6.5

https://www.vmware.com/resources/compatibility/sim/interop_matrix.php#interop&2=&1=

Image


Step 0:Run VMware migration assistant

在windows  VC 上,執行  \migration-assistant\VMware-Migration-Assistant.exe


image


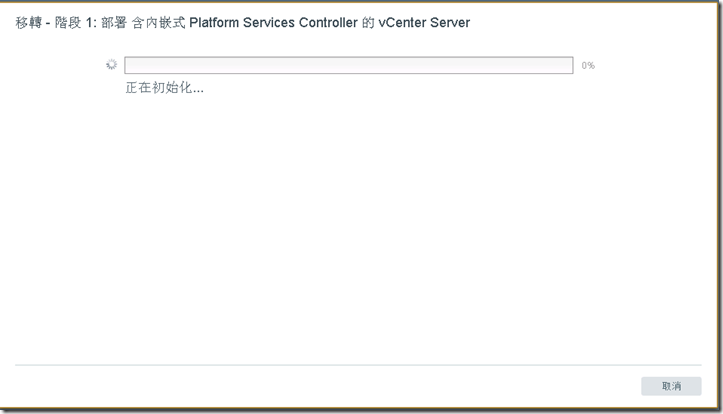
Step 1: Deploy the vCSA

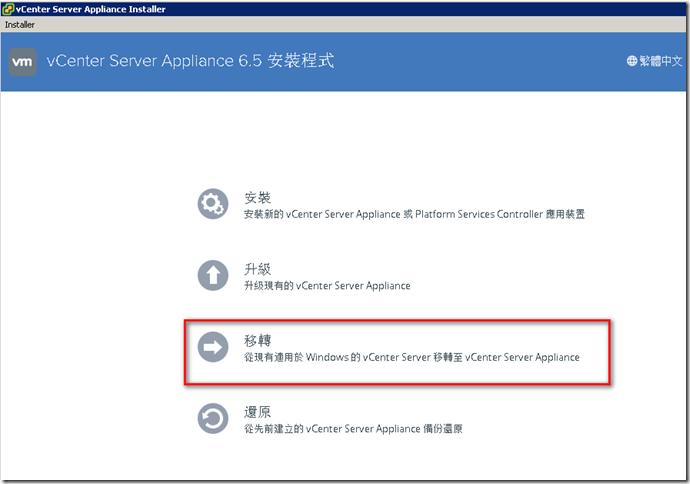
選擇 Migrate 開始 

Image


Image(4)

Image(5)

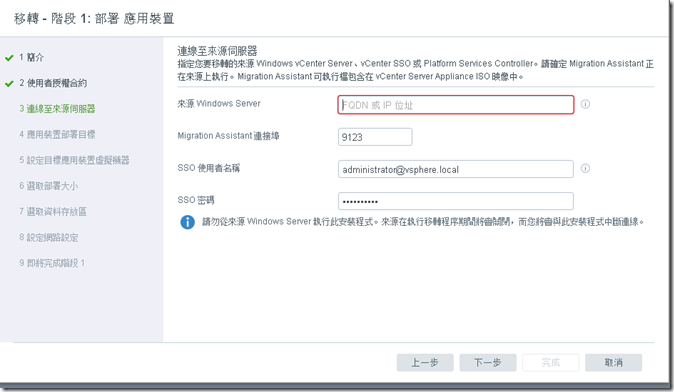
輸入 要升級 到 VCSA 6.5 的 IP 或 FQDN

使用  administrator@vsphere.local 登入

Image(6)

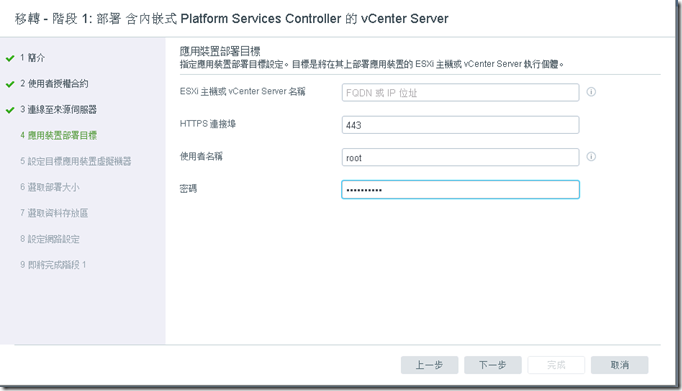
輸入要佈署 Vcenter 的 ESXI 主機

Image(7)

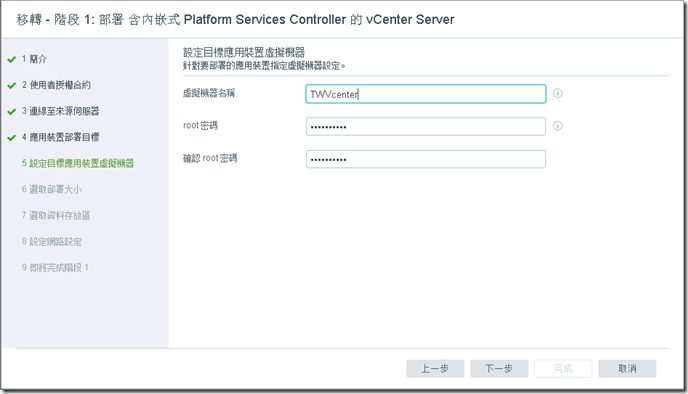
輸入新的 VCSA 名稱和 root 密碼。可以先把 舊的 Windows Vcenter 更名,或在後面添加一些定義詞,避免名稱相同。 

Image(8)

選擇你要的 VM 規模大小

Image(9)

選擇要再放那個 Storage ,可以使用 thin provisioning mode

Image(10)


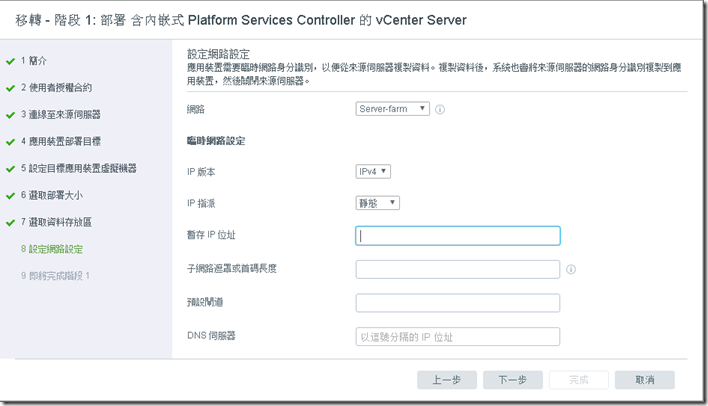
提供一個臨時的 網路 IP


Image(11)

再次確認,資訊是否確認。若沒問題,按 完成 ,開始進行Migration

image


Image(13)

Image(14)

Image(15)

安裝已經完成 ,可以按 繼續 開始 第二階段 設定 。

也可以連到 https://<ip or vCSA FQDN>:5480 開始 第二階段 設定

Image(16)


Step 2: Configuration and data migration

開始 第二階段 設定

Image(17)

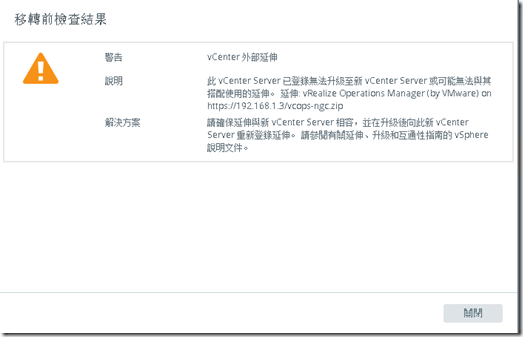
移轉前檢查,會出現一些警告。

Image(18)

如果之前的 Windows Vcenter已經有加入  AD ,需要提供帳號密碼來讓 VCSA 加入

image


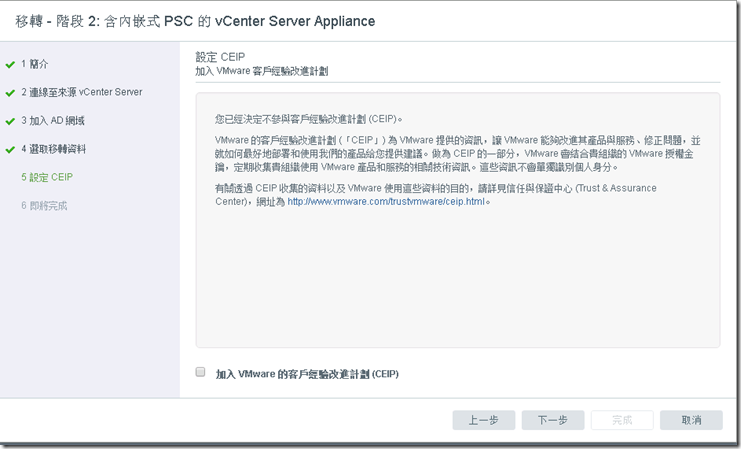
選擇要 移轉 的資料

Image(20)

Image(21)

再次確認,資料都正確。若沒問題,按 完成 ,開始進行移轉。

Image(22)

這邊說明,如果你確定同意 OK的話,來源 Windwos Vcenter 將會被關機

Image(23)

開始移轉

Image(24)

Image(25)

Image(26)

Image(27)

跑了約 3 個多小時,終於跑完了

Image(28)